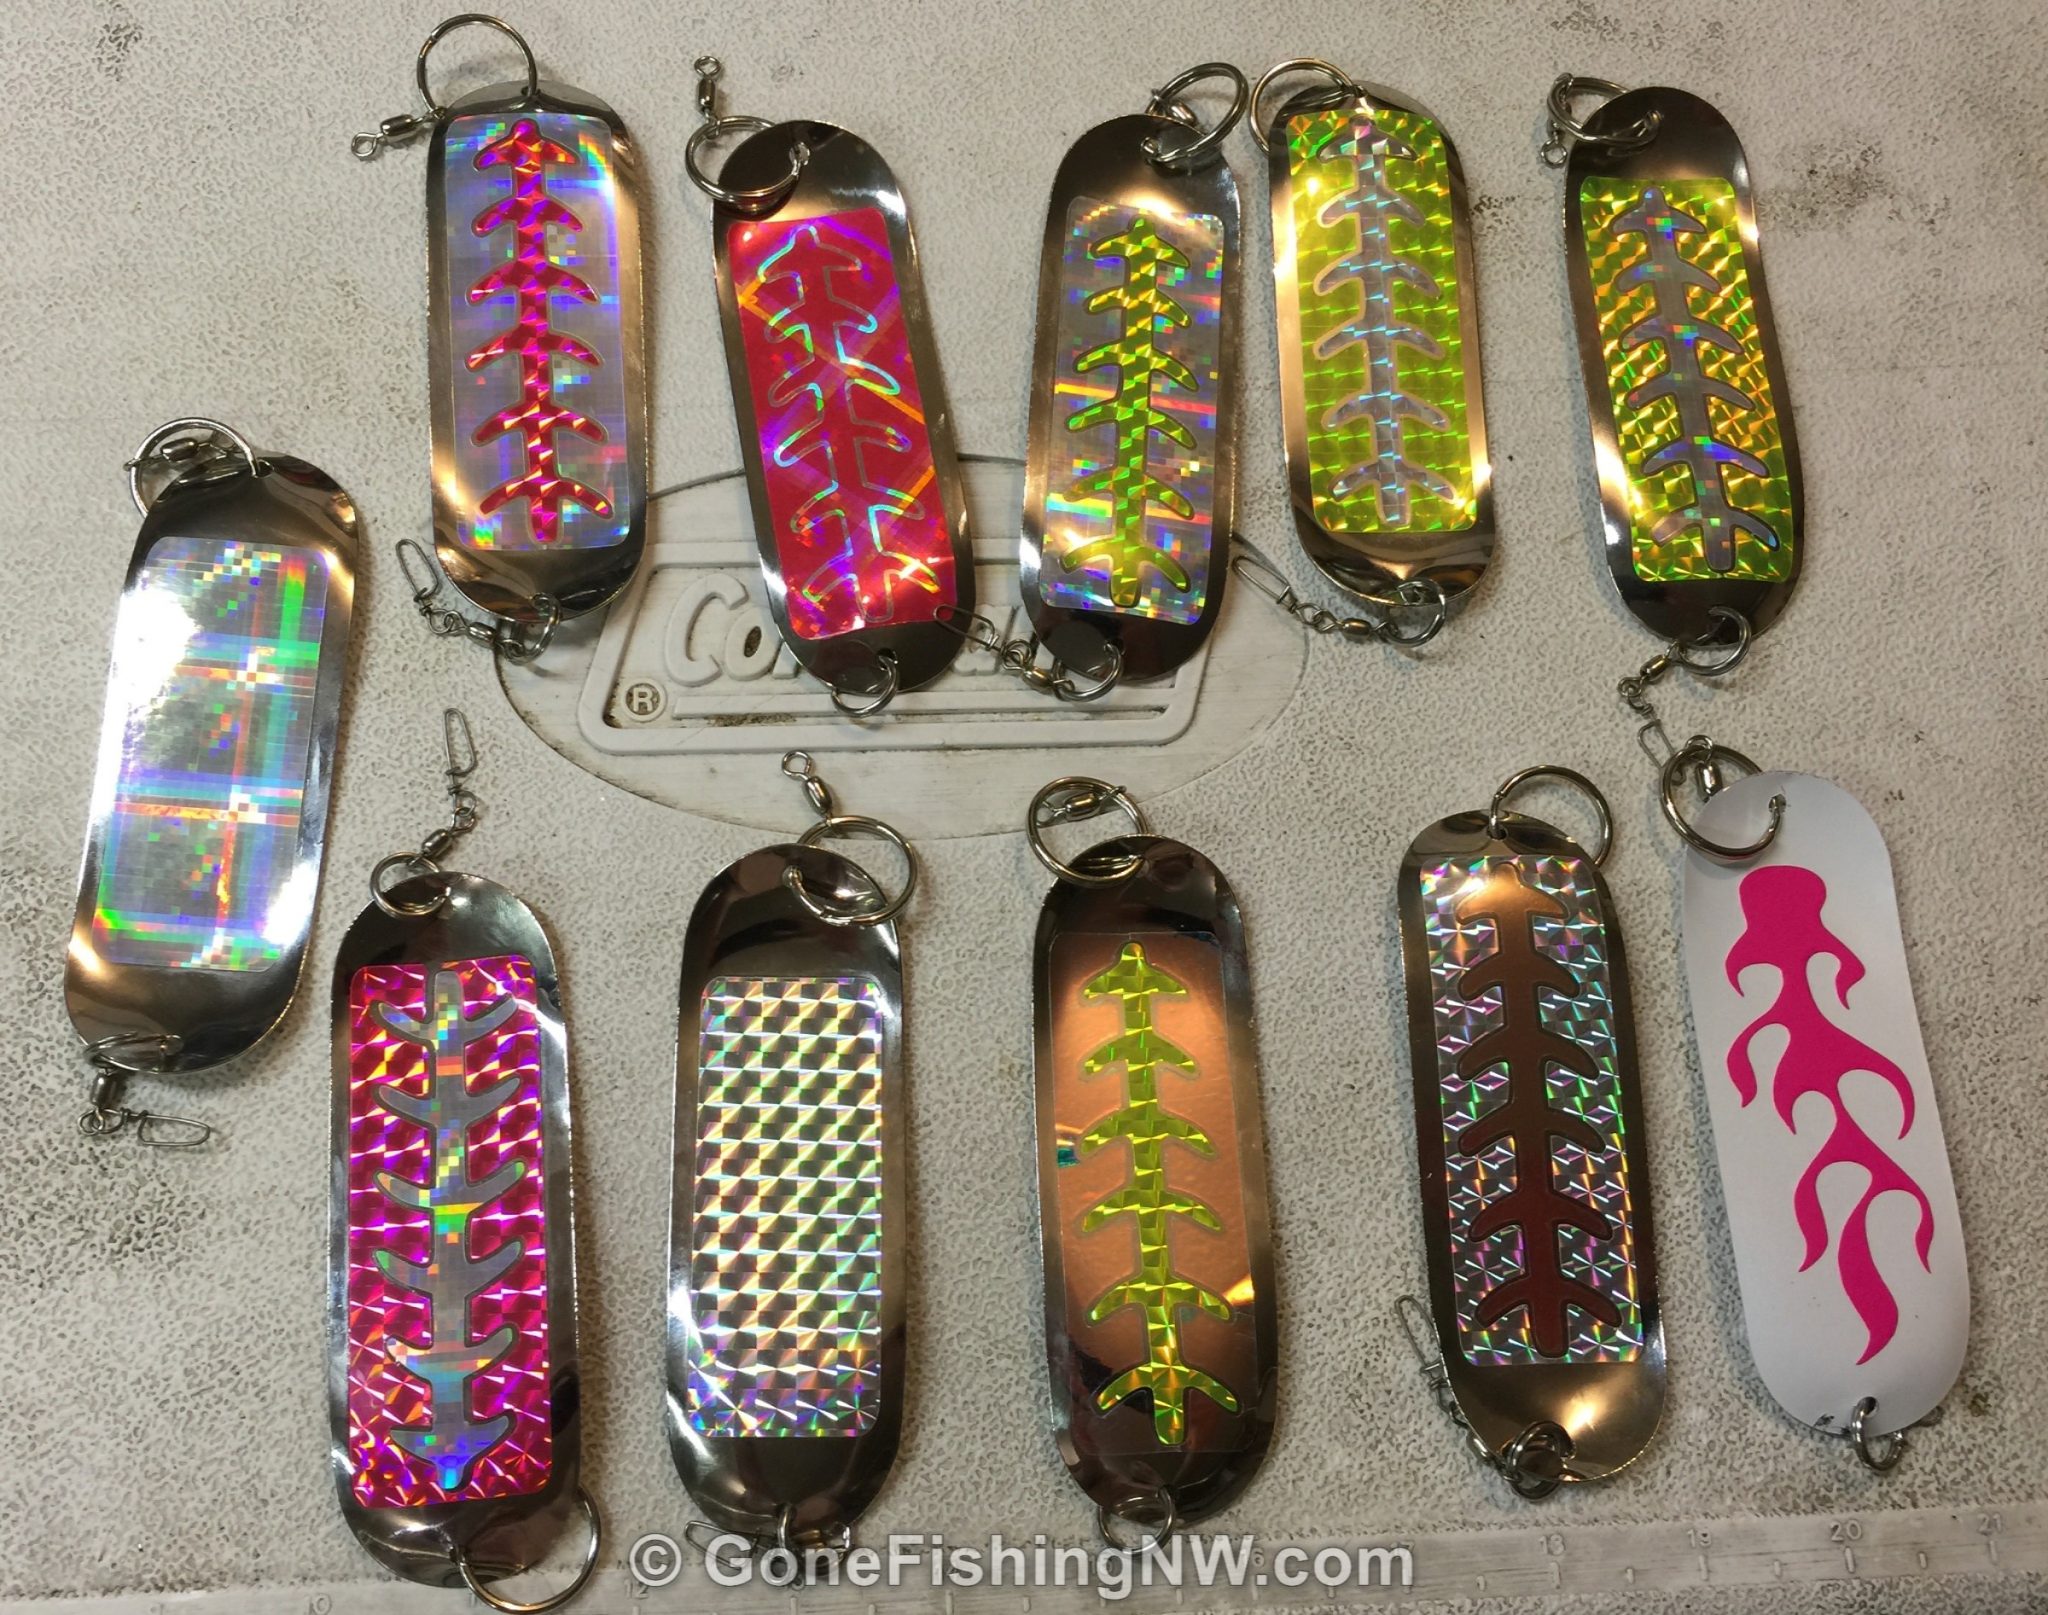
Dodgers are fishing tackle which creates both long distance attraction and can add an erratic movement to your lure. They are usually flat pieces of metal with some bends in it. When used properly they move in a side-to-side swinging motion.
If you go to a store you’ll find them available in a variety of dodgers in different sizes, colors, and patterns. You can usually tell the die-hard kokanee fishermen, because they can’t pass the dodger aisle in the tackle store without picking out at least one more. Often, they also need to buy special storage for all their dodgers.
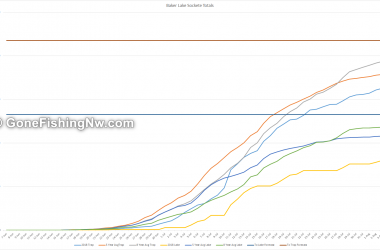
As you can guess both kokanee and sockeye really like the flash of dodgers. For more tips on fishing for those species checkout the Kokanee and Sockeye pages .
Like with most tackle, you may have an idea of what will work but can’t find exactly that somewhere. Also, you may want to save money when building your dodger collection. Whatever your motivation creating your own custom dodger can be easy and fun.
This article covers how to create a custom dodger by cutting lure tape into custom sticker patterns.
What You’ll Need
You will need a few things to create your custom dodger.
- A dodger “blank”
- With associated hardware, such as swivels, snaps and split rings
- Lure tape in the pattern/colors you desire
- A computer controlled cutting machine
- Transfer tape
If you plan to create just one or two dodgers, when the easiest thing to do is to buy an already made dodger at the store, such as this plain chrome one. However, if you plan on making more, then it is best to buy parts from someplace that sells tackle components and build your own. I get mine from Hagen’s. If going that route then I highly suggest also getting a pair of split ring pliers.
A variety of lure stickers are available online. The Brad’s brand works well, as does the Mad River brand. However my favorite place to buy lure tape is via eBay.
There are a few brands of consumer computer controlled cutting machines. These machines can make cutting complicated patterns quick and easy. I’ve used both the Silhouette Cameo and Circut. The software for the Cameo is easier to use and more powerful, but I think the Circut hardware is better. Fortunately, both work fine. In this example I use the Circuit.
Transfer tape is a clear sticky tape you can use to pick up your cut sticker off its backing, and then place it where you want it to go. It is essential for complicated patterns, and even helps with simple patterns. For these application 6” tape works great.
Creating The Sticker Pattern
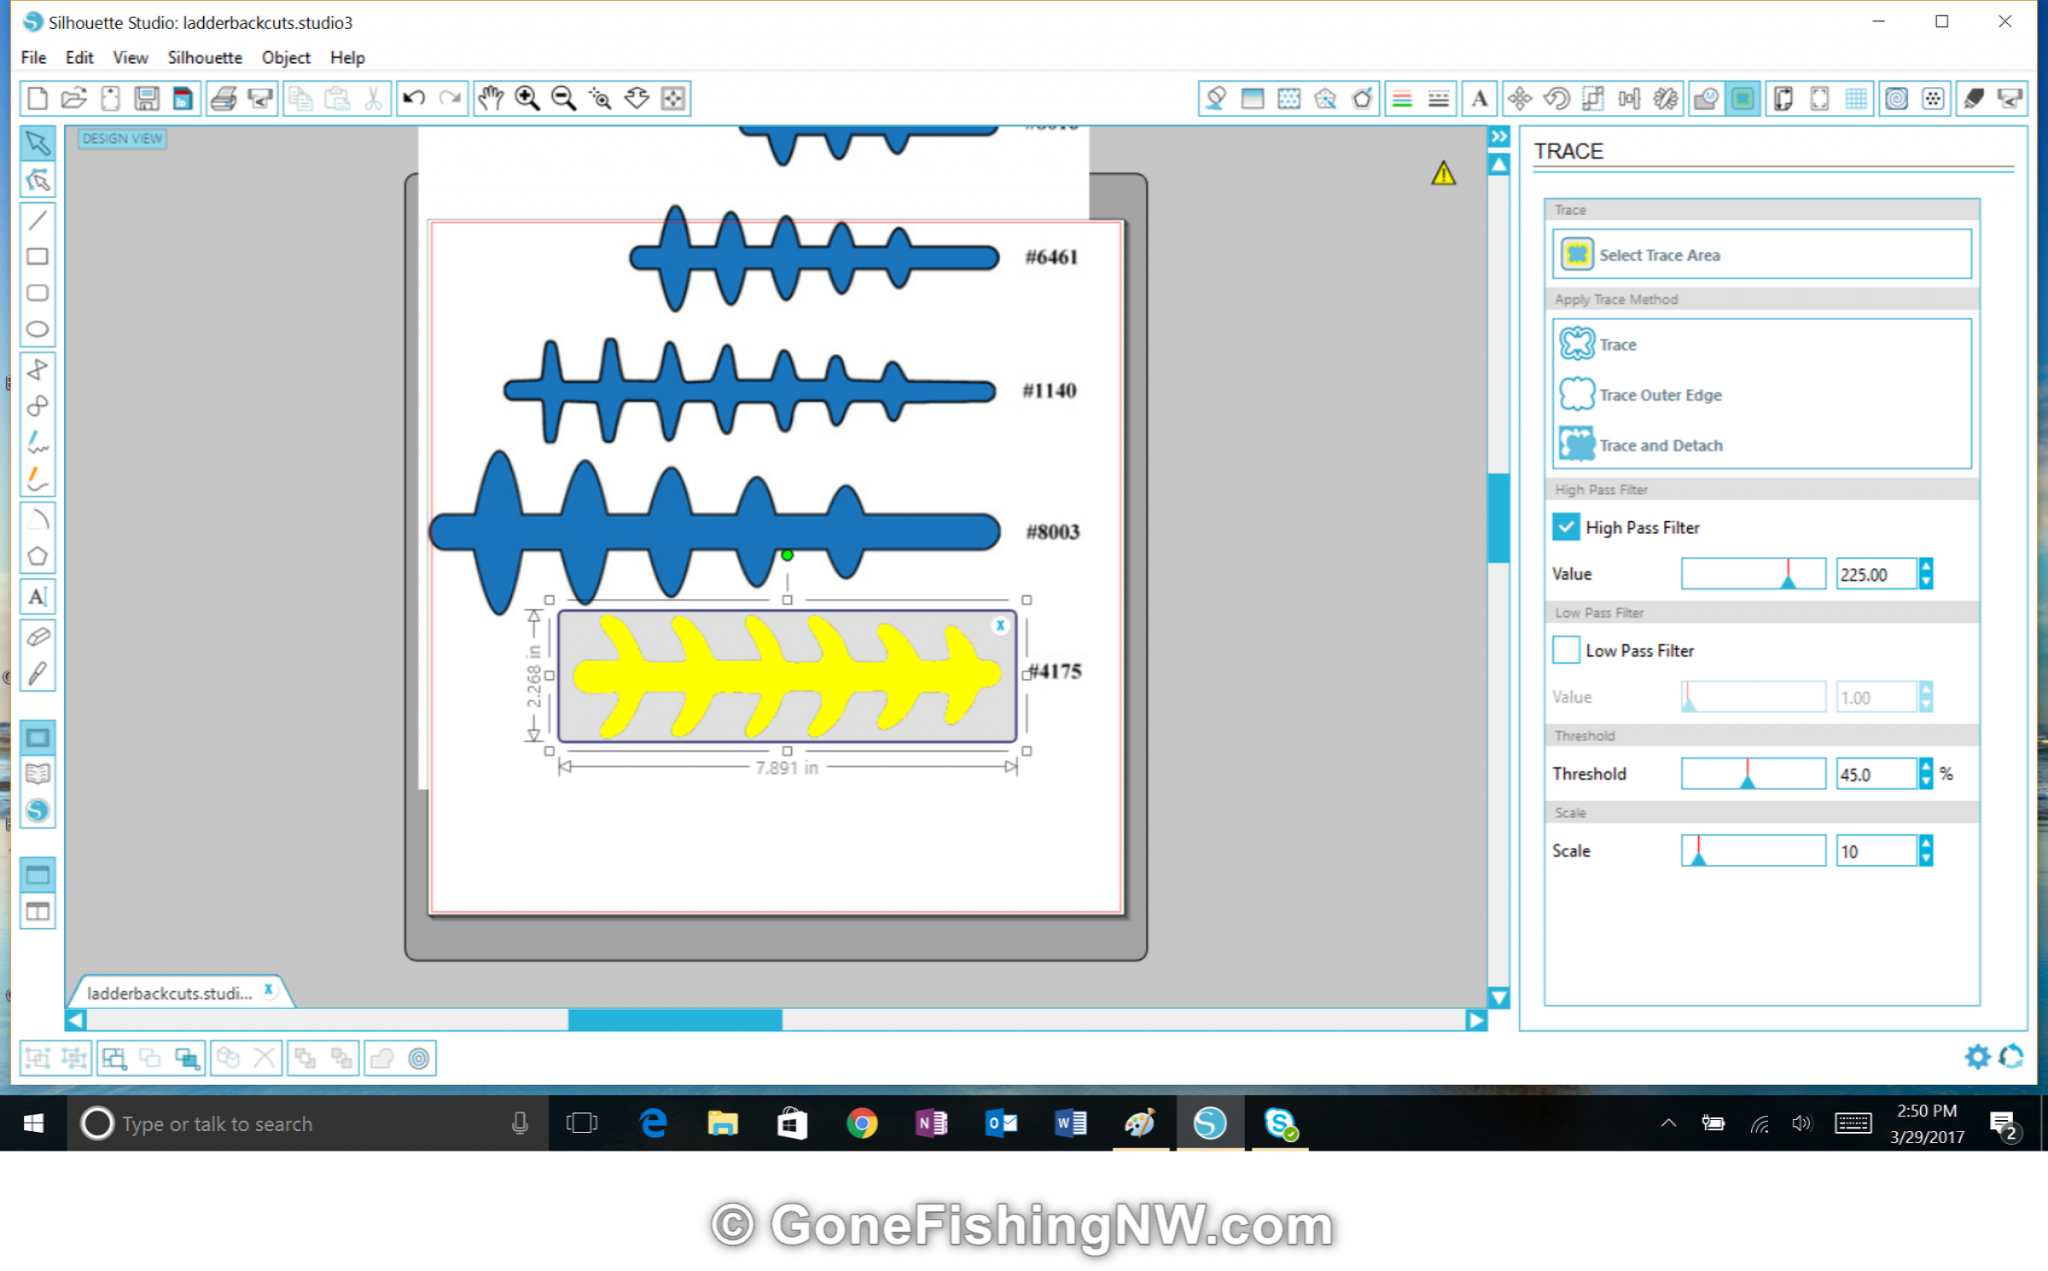
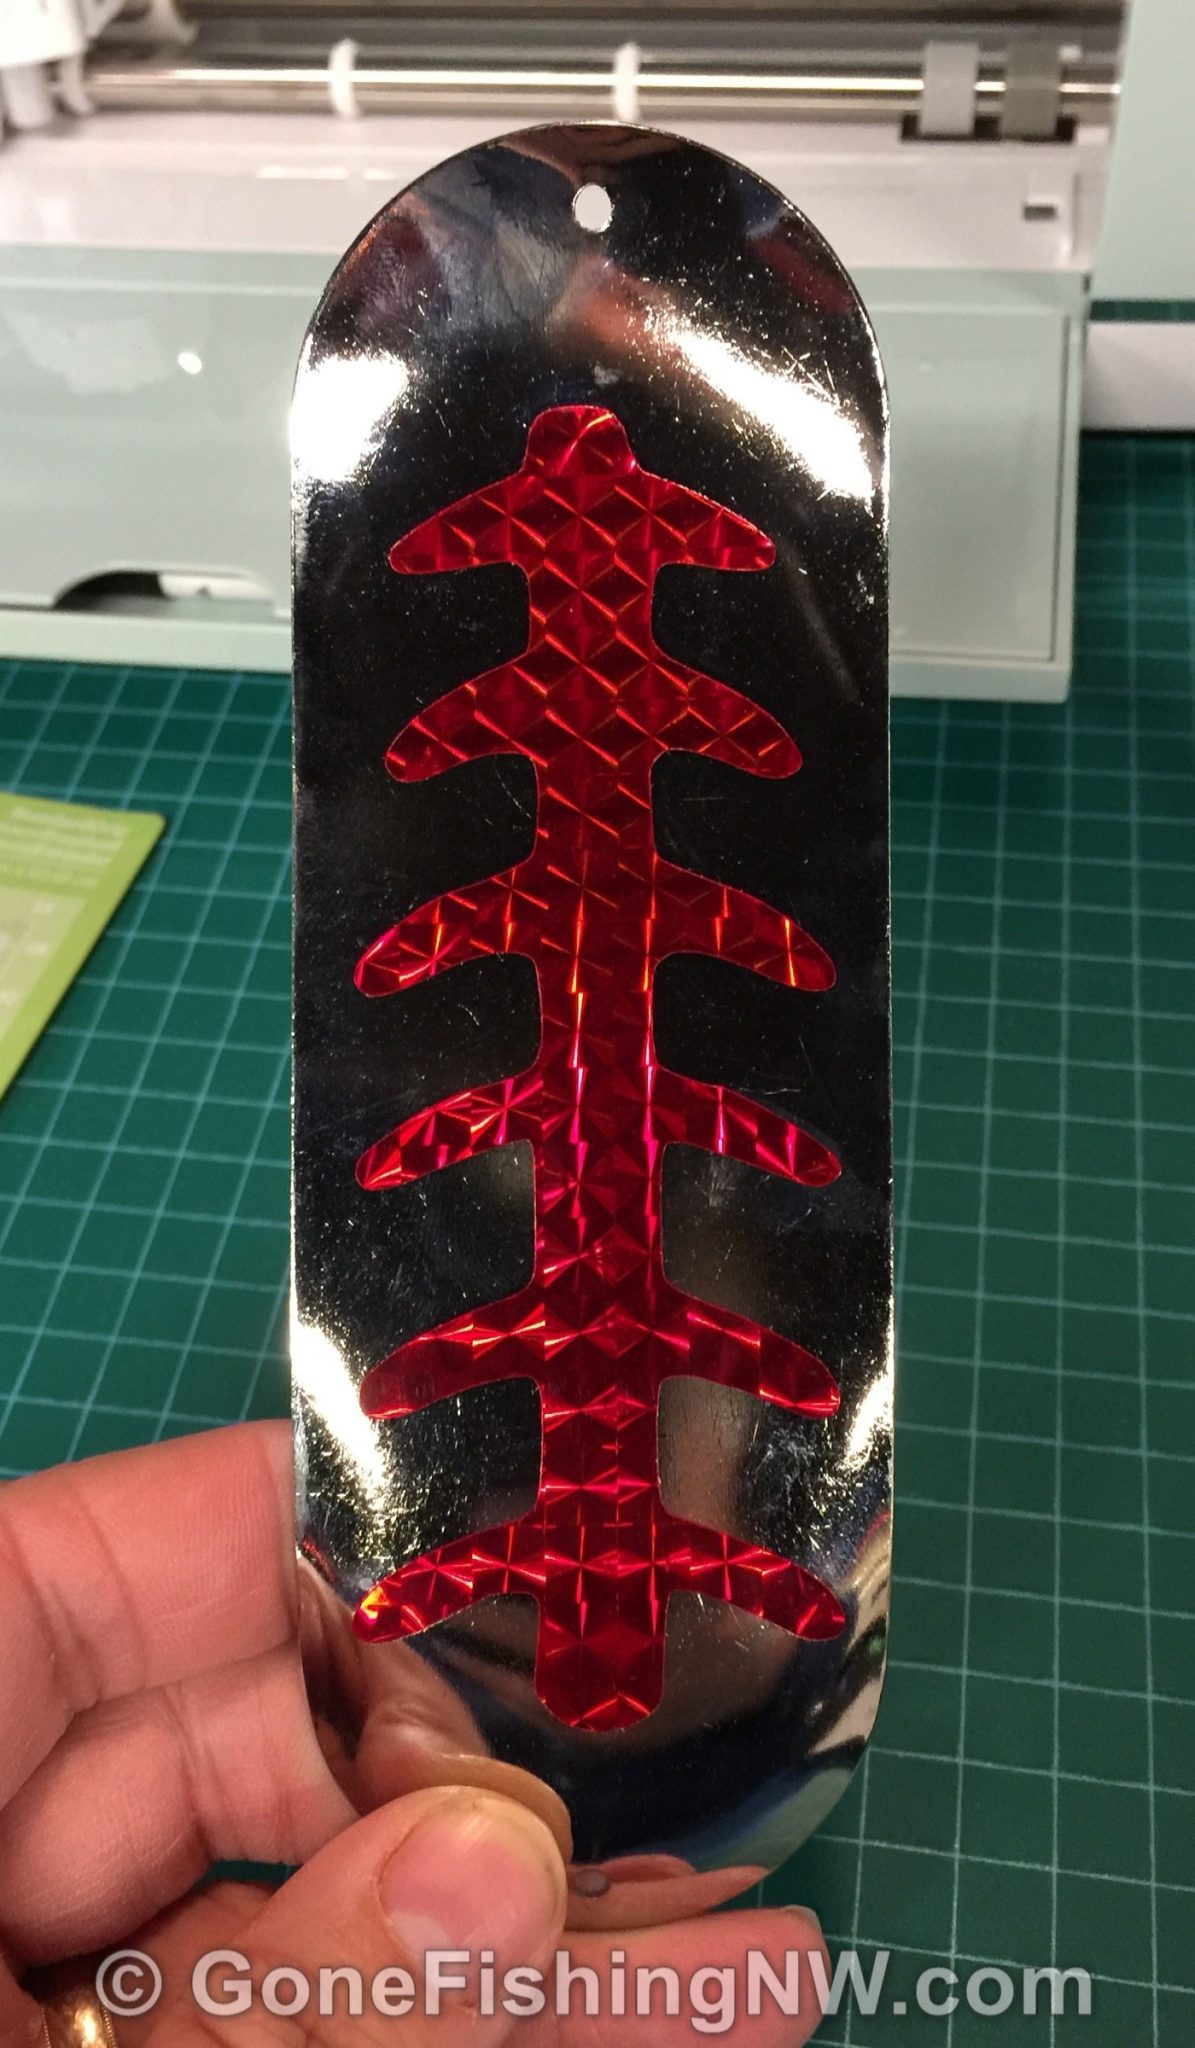
Now that we have all our supplies we are ready to create the stickers. In this example we are going to use a ladder back pattern, which I’m sure you’ve seen on commercially available dodgers. The ladderback pattern has a central line with herring bone type things sticking out the side.
Since I’m not a good artist to draw one from scratch, I start by finding a picture of the pattern online. I look for a picture online which is clear and high contrast, as those are the easiest to trace for the cutter.

Once I find a likely image I save it locally, and then open it up in Silhouette Studio, which is the software for the Cameo. You can download and use the software without owning a Silhouette device, which is great because it does the best job tracing out of the various software I’ve used.
I trace the image to get the outline of the pattern, then fill it with red (which matches the outline color), to have a crisp image. I then capture this as a bitmap with Snipping Tool.
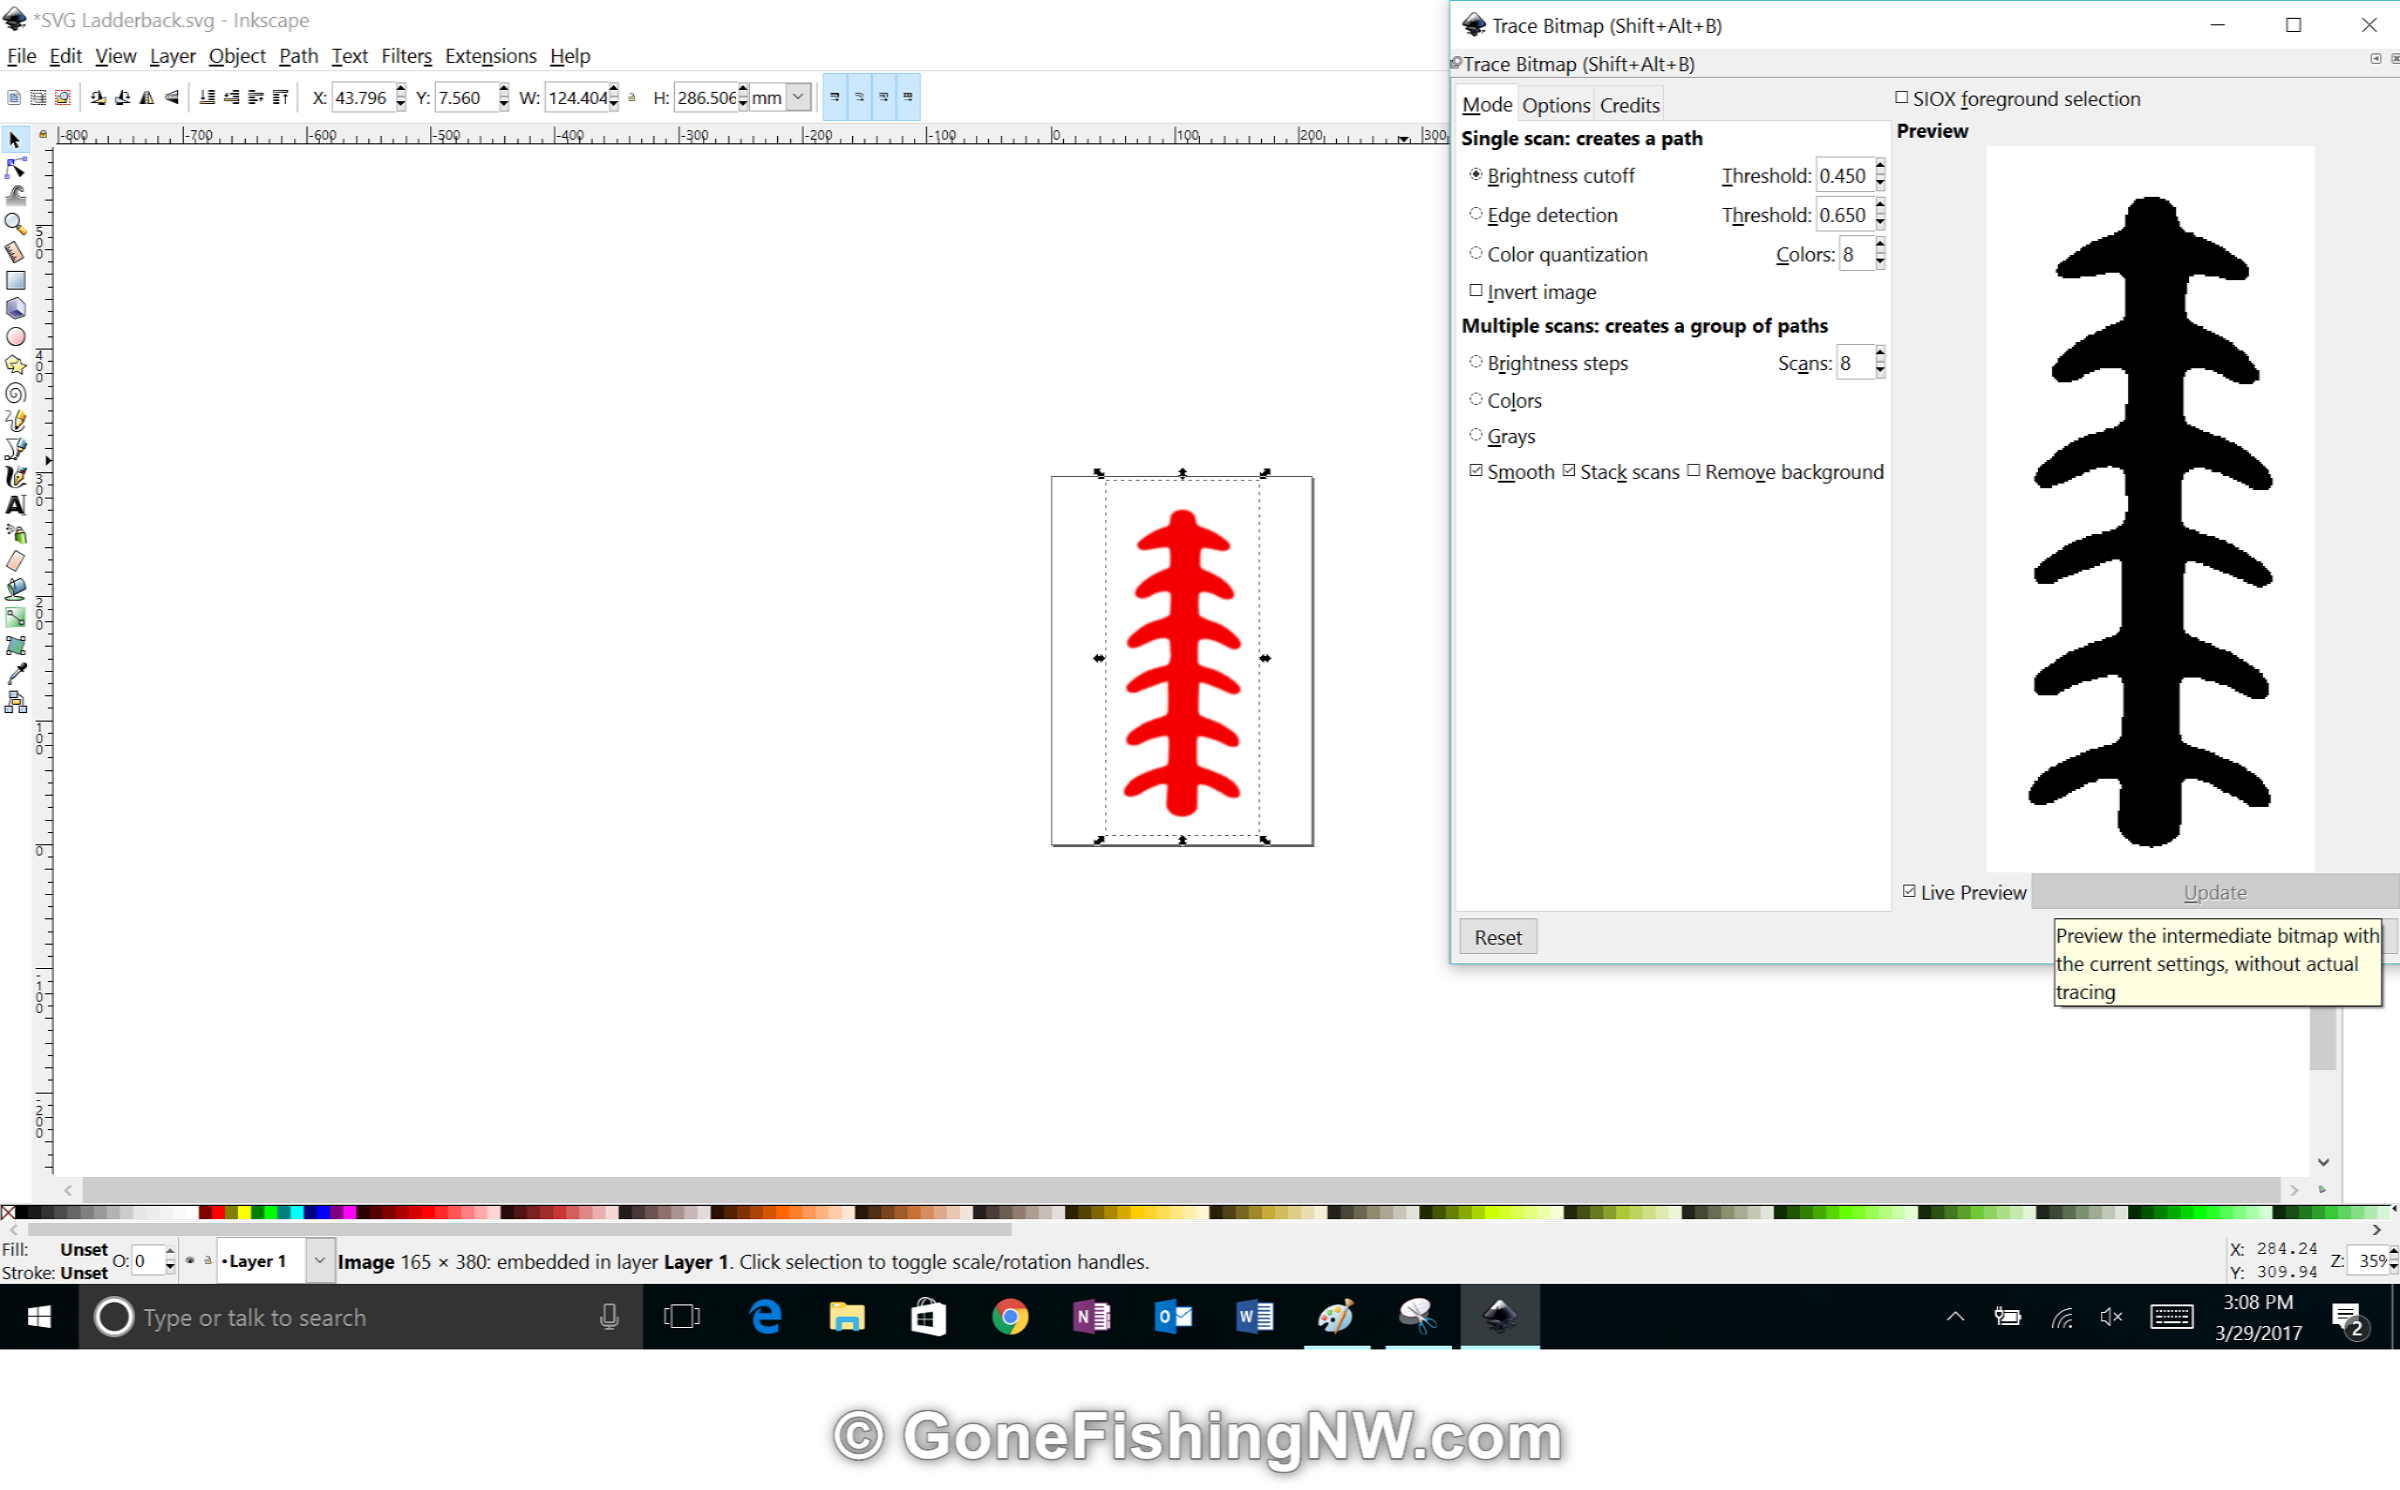
I then fire up different software called Inkscape. In this software, I import the bitmap image I just created, and use it’s trace functionality. I then save this as an SVG file, which is a vector file rather than a bitmap. We need to do this because the Circut software works best with SVG files.
Cutting The Sticker
Now that I have the pattern as a SVG file I can move on to the cutting stage.
Inside Circut Design I create a new project and click on “Upload Image”. I use that to upload the SVG file. I can then position, rotate and resize the image. Make sure to measure the dodger to know what size you want the image to be.

Once I get it sized and oriented right then I copy and paste the image so I can cut more than one at the same time.
The lure tape then needs to be placed on the cutting mat. Pay attention where you position it, so that you know where to tell the software to cut. If the adhesive isn’t sticking well, then some extra tape along the edges help hold it in place.
The cutting mat is then loaded into the Circuit, and the cut started.
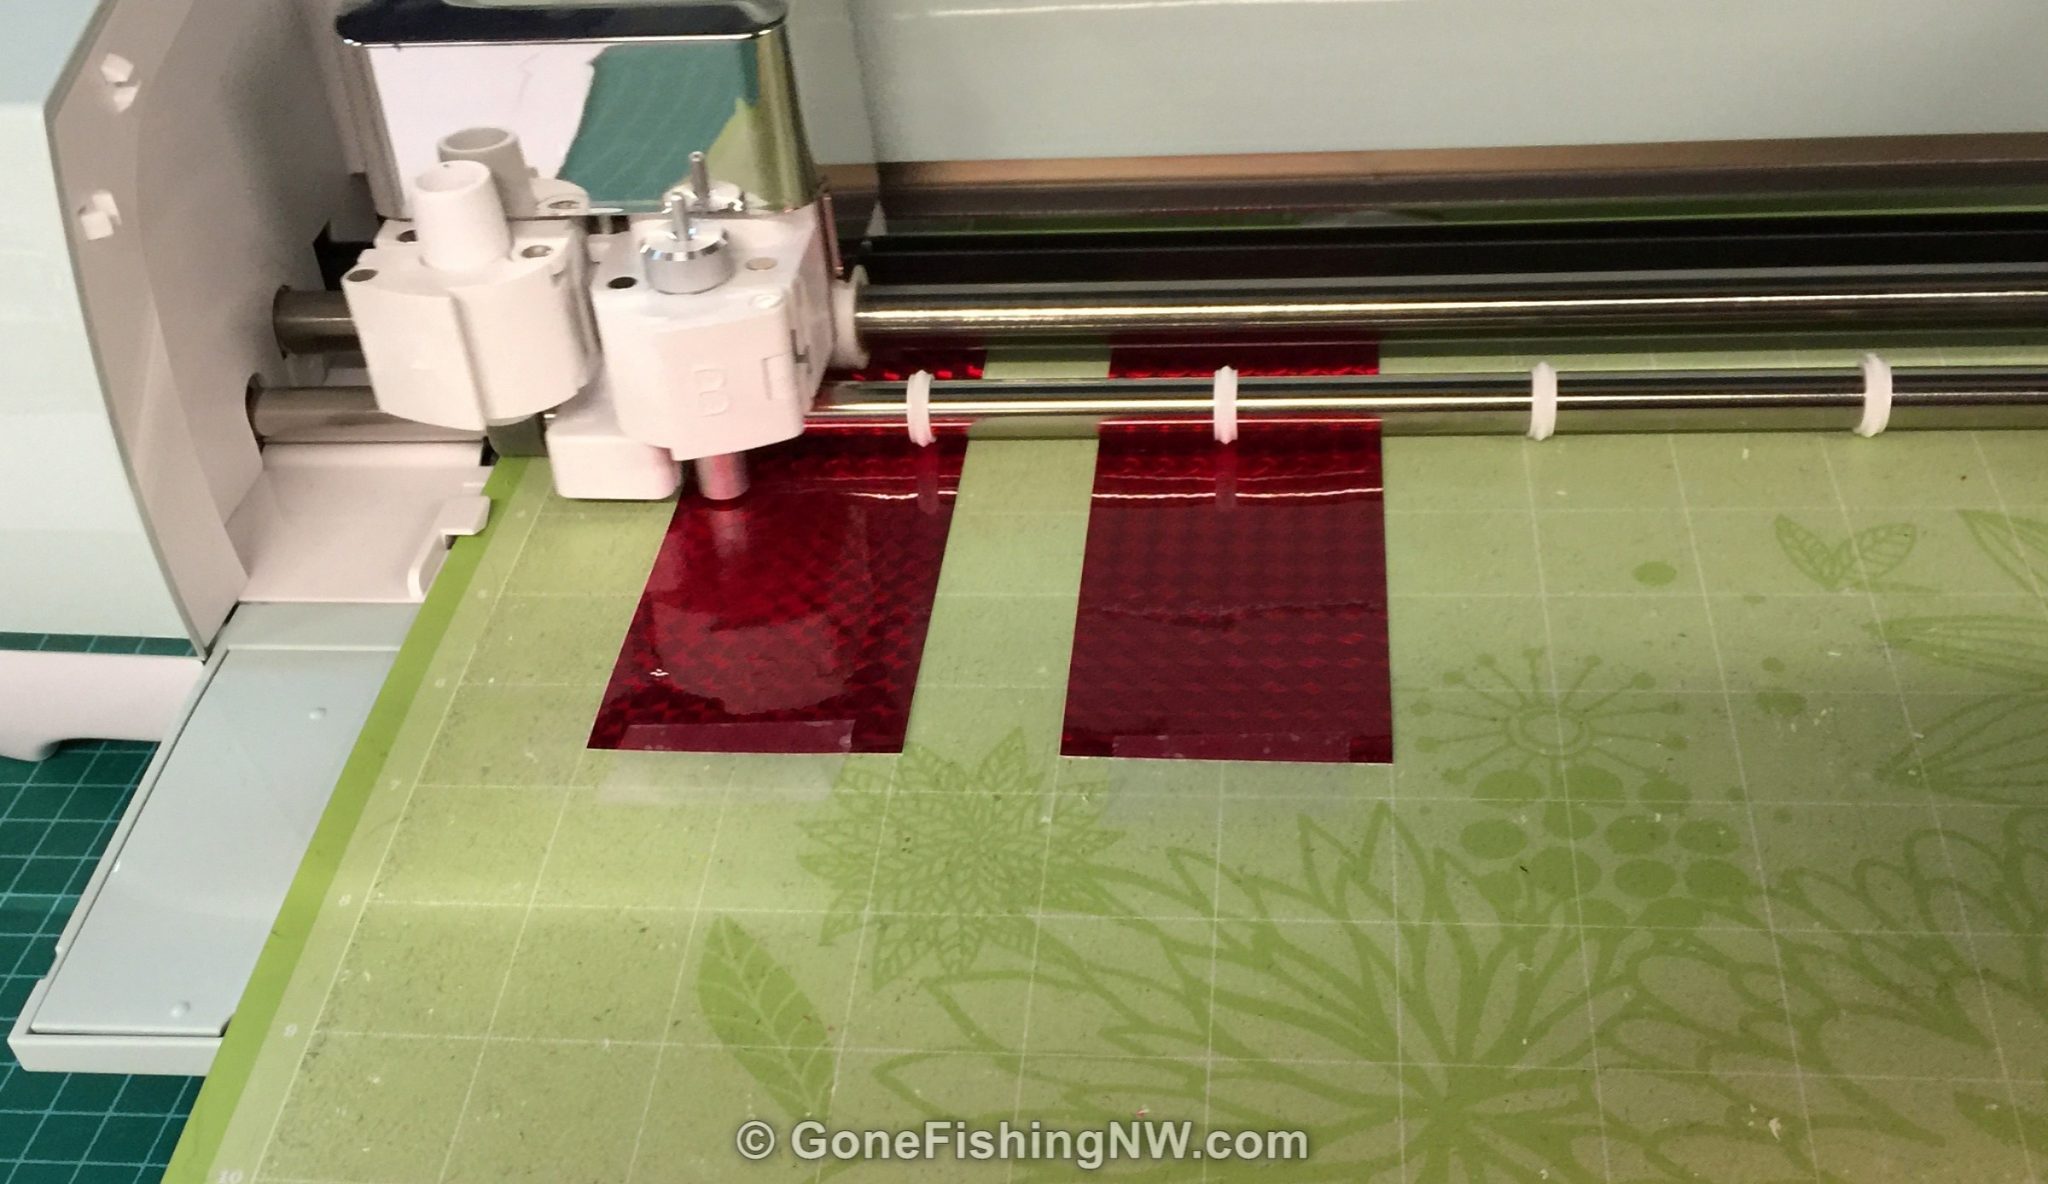
Once the cut is finished, using scissors I cut off the excess lure tape and save it for future projects. Then I remove the lure tape that isn’t part of the pattern, so all I have left is the final sticker.

Building The Dodger
Now that the stickers are created we can build the dodger.
- Cover the sticker with a piece of transfer tape.
- Next clean the dodger’s surface with cloth to remove any fingerprints or debris
- Peel the back of the sticker, and holding the transfer tape position in the right location on the dodger.
- Firmly press the sticker and transfer tape onto the dodger. Apply good pressure along the edges of the sticker.
- Peel off the transfer tape.
- Repeat for the other side, if so desired
- Using a split ring, attach a swivel to the head of the dodger
- Using a split ring, attach a swivel and snap to the tail of the dodger
Conclusion
Building your own custom dodger with stickers and a computer cutter is easy and fun. It can also save you money, and let you create fishing tackle that is exactly how you want it to be. You are just limited by your imagination, and the materials you can find.
Make sure to checkout the Kokanee and Sockeye pages for more tips on tackle.